
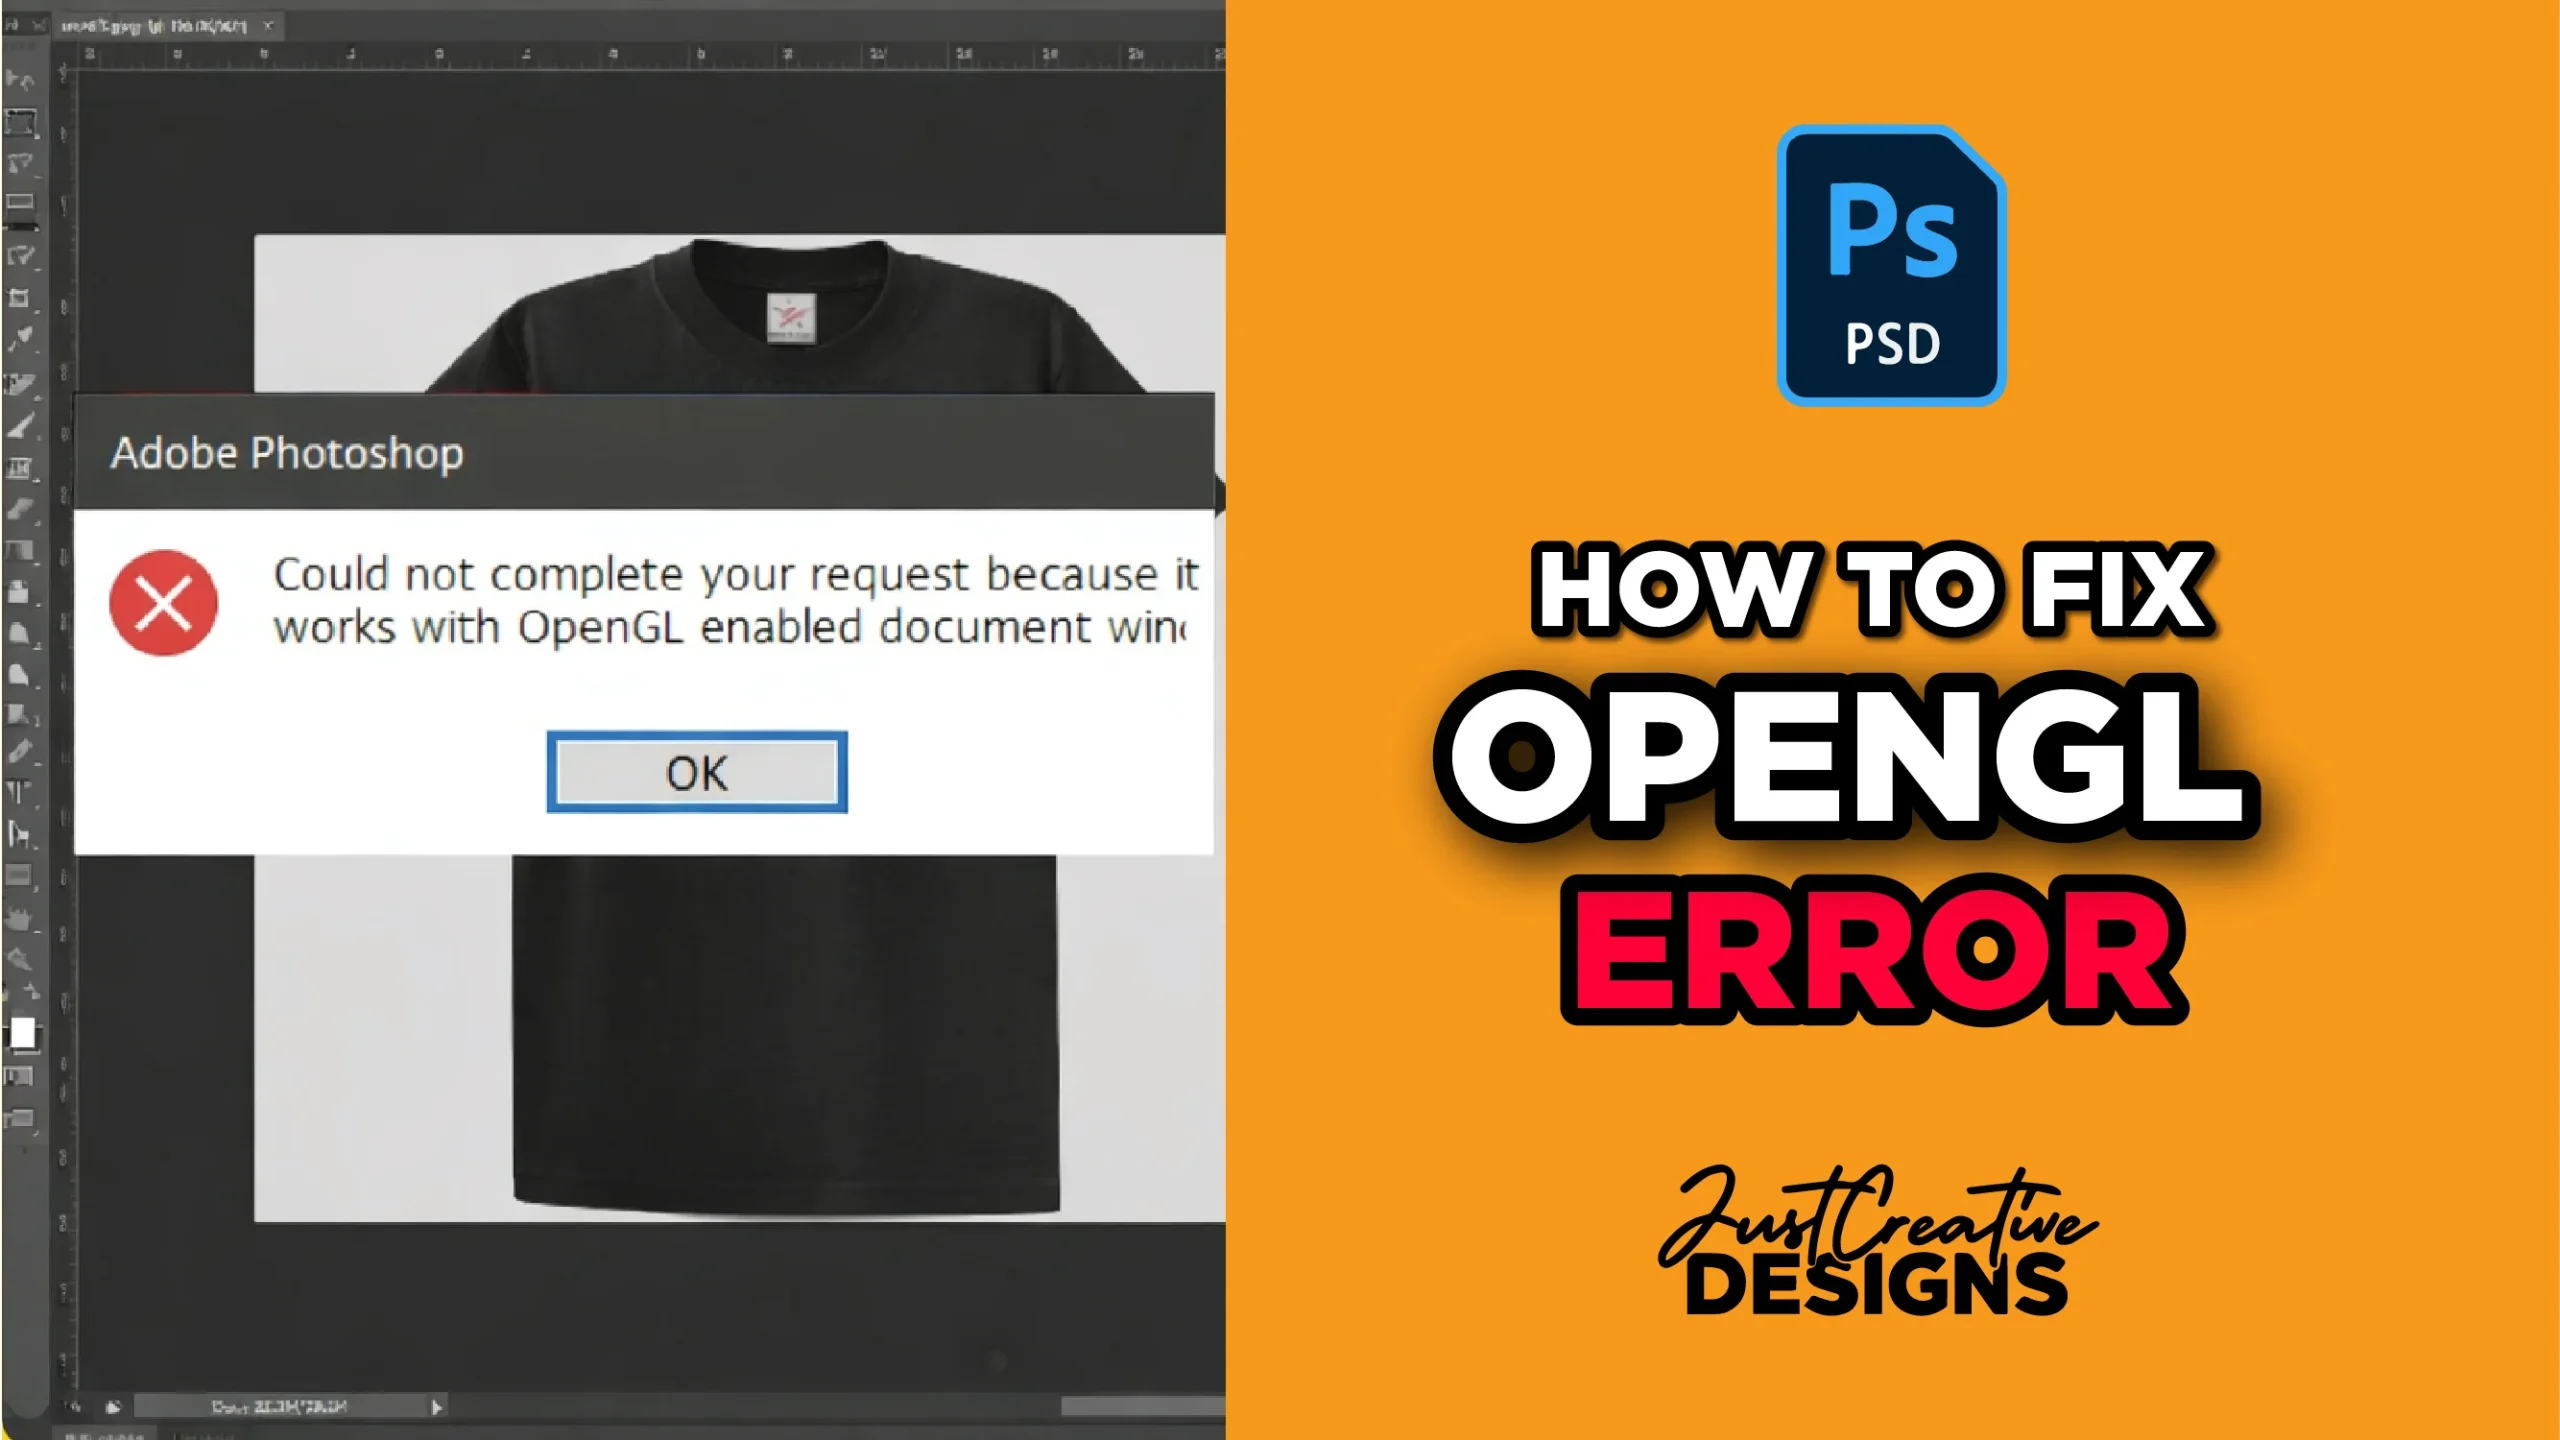
OpenGL error in Photoshop appears as a notification message on the screen as you work. The error can sometimes be shown by failing to detect your graphics processor in Photoshop.
Table of Contents
This can drastically slow your workflow because the issue prevents Photoshop from accesing crucial GPU-accelerated features, like rotate option, 3D tools, advanced filters and smooth zooming.
If you encounter these features disabled or not working properly, it is most likely that your software is facing an Open GL error. This post explains how to detect it and the easiest way you can solve the error. Before you start make sure you save your Photoshop projects.
What Causes the OpenGL Error in Photoshop?
Many advanced features in Photoshop require a lot of power that is supplied by the Graphics Card to OpenGL which the runs these advanced tasks. Any problem on OpenGL, whether it is turned off or it does not access GPU properly automatically results to lags and collapse of some applications.
The most common ways to diagnose this error include checking whether the Use Graphics Processor is active or grayed out. If grayed out, there is an existing error.
If you try to enable GPU settings but it does not work, can indicate existence of the error. Disabled perfomance options and unavailability of features like 3D and rotation is another indicator of an error.
Finally, Photoshop is set to display an error message on screen showing OpenGL-related warnings or errors.
Steps to follow when Fixing OpenGL Error
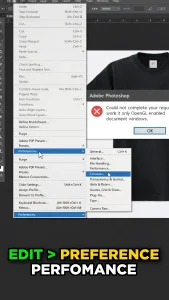
Step 1: Confirm whether OpenGL Is Disabled
Before you do anything, you need that the OpenGL option is off. To do this, go to Edit > Preferences > Performance in Photoshop.
Under Graphics Processor Settings, confirm whether the Use Graphics Processor option is unchecked or grayed out. Also check other advanced features like 3D setting.
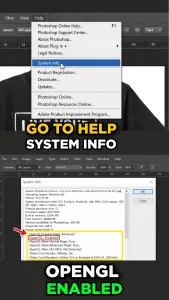
Step 2: Verify OpenGL Status
Photoshop provides full information on the problem. Go to the Help Menu on top. Choose System info, then scroll in the report until you find OpenGL Drawing.
If it shows OpenGL Drawing: Disabled, then Photoshop is not able to use OpenGL, which is the reason causing the issues. Let us fix the issue.
Step 3 and 4: Close Photoshop and Download the Fix File
Close Photoshop completely to ensure no files are still running in the background. Download the necessary OpenGL file (this is usually provided in the tutorial or from Adobe support). After downloading the Zipped fix file, choose the version that matches your system type (32-bit or 64-bit).
On Windows, right-click This PC and select Properties. Under the system information, look for System type. Once you know whether your computer is 64-bit or 32-bit, select the matching OpenGL file and download.
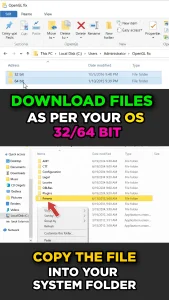
Step 5: Copy the OpenGL File to Photoshop Installation Folder
Copy the OpenGL file you selected, then navigate to your Photoshop installation folder. By default, this is usually located at C:\Program Files\Adobe\Adobe Photoshop [Version]. Once you open the folder, paste the file directly into the Photoshop directory to replace or add the necessary OpenGL component.
Step 6: Restart Photoshop
Go to Edit > Preferences > Performance, where you should now see the Use Graphics Processor option and the 3D settings active. To confirm everything is working, go to Help > System Info—this time, OpenGL Drawing should show as Enabled. This should work but if it does not, try the below additional options.
Additional Solutions If Photoshop OpenGL Error Still Persists
Sometimes the Fix may fail to solve the problem. You will notice Graphics Processor Not Detected in Photoshop. Below are some advance alternatives to solve this.
Update Your Graphics Drivers. Outdated GPU drivers are one of the most common causes of Photoshop OpenGL errors.
Update your graphics drivers directly from your GPU manufacturers like NVIDIA Drivers, AMD Drivers or Intel Graphics Drivers. After updating, Restart your computer and Open Photoshop again. Check whether GPU acceleration is working
Enable GPU Acceleration in Photoshop. Go back to: Edit → Preferences → Performance. Now enable the Use Graphics Processor if available.
Click Advanced Settings and set Drawing Mode to: Basic, Normal and Advanced. Most users should use Normal mode. Choose OK then restart the Photoshop application
Check Your GPU Compatibility. Some older graphics cards may not fully support modern OpenGL acceleration. To verify compatibility:
- Check your GPU model
- Compare it with Photoshop’s hardware requirements
- Ensure OpenGL support is available
You can review the official requirements here: Adobe Photoshop System Requirements.
Reset Photoshop Preferences. Corrupted preferences can sometimes disable GPU acceleration. To reset Photoshop preferences, close Photoshop, Hold Alt + Ctrl + Shift (Windows) or Option + Command + Shift (Mac). Open Photoshop while holding the keys. Confirm the reset dialog. This restores Photoshop to default settings.
Reinstall Photoshop (If Necessary). If the issue still continues a clean installation can repair damaged OpenGL or graphics-related files.
- Uninstall Photoshop completely
- Restart your computer
- Install the latest version again
Another easy to follow video guide to solve the problem.
Conclusion
The Photoshop OpenGL error usually happens when GPU acceleration becomes disabled or Photoshop cannot detect your graphics card correctly.
By updating graphics drivers, enabling the Graphics Processor setting, checking OpenGL status, and resetting Photoshop preferences, you can restore full Photoshop performance and re-enable graphics features quickly.
Once fixed, Photoshop should run smoother and all graphics-related tools should work normally again
Related Post
Frequently Asked Questions
Why is OpenGL disabled in Photoshop?
OpenGL may become disabled if Photoshop cannot detect your graphics card, your GPU drivers are outdated, or GPU acceleration settings are turned off.
Why is Use Graphics Processor grayed out in Photoshop?
Grayed out Use Graphics Processor can be caused by a number of issues like, incompatible graphics drivers, unsupported GPU hardware, corrupted Photoshop preferences or outdated Photoshop versions.
Does Photoshop require OpenGL?
Yes. Photoshop uses OpenGL for GPU acceleration, smoother zooming, Rotate View, 3D rendering, and other graphics-intensive features.
How do I enable GPU acceleration in Photoshop?
Go to: Edit → Preferences → Performance. Toggle use Graphics Processor then restart Photoshop.