
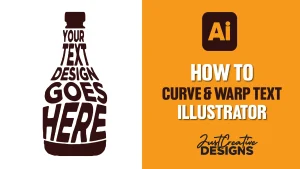
The ability to Curve text in Illustrator allows you to create more dynamic and professional-looking designs. Whether you want to wrap text around a logo, create curved typography for t-shirts and merchandise, or design stylish social media graphics, Illustrator provides several easy ways to achieve the effect.
Table of Contents
In this tutorial, you will learn how to curve and warp text in Illustrator using Warp effects, Type on a Path, and Envelope Distort so you can choose the method that works best for your design.
Method 1: Warp Text in Illustrator
The easiest way to curve text in Illustrator is to use the Warp option.
Step 1: Click T or navigate to the text tool. Click once on your artboard to type your text.
Step 2: Select your text by clicking on it. Go to Effect>Warp
Step 3: Choose Arc. Adjust settings to what you like best.
Step 4: Try out different styles like Flag to see how it looks.
Method 2: Curve Text by typing on Path
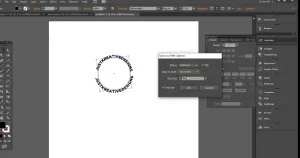
Step 1: Create a path that you want your text to curve around.
Step 2: Create a Circle or an Ellipse Shape or circle
Step 3: Click and hold on to the type tool to bring up the type on the path.
Step 4: Click along the circle edge path and write your text
Step 5: Adjust the text by going to Object>Type on Path Options or moving the bracket ends.
This method can also be used when you want the text to move along a curved line.
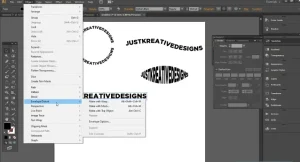
Step 1: Select the Pen Tool (Shortcut: P)
Step 2: Click to create a point and then click again to draw a curved line. Check out our article on How to use the Pen tool.
Step 3: Click and hold on to the type tool to bring up the type on the path.
Step 4: Click along the edge path and write your text. It will flow along the path you made.
Step 5: Adjust the text by going to Object>Type on Path Options or moving the bracket ends.
Method 3: Envelope Distort
Step 1: Create Your Text: Start by creating the text you want to curve. Select the “Type” tool (shortcut: T), click on your artboard, and type your text.
Step 2: Create a Shape: Draw a shape that will serve as the envelope for your text. This shape will determine the curve.
You can use the Pen tool or any other shape-drawing tool to create the shape. Ensure that the shape covers the area where you want the text to curve.
Step 3: Select Both Text and Shape: Click on the text to select it, and then Shift-click on the shape to select it as well. Go to Object>Envelope Distort>Make with Top Object.
Step 4: To Adjust the Curve after applying the Envelope distortion, use the Direct Selection tool (shortcut: A) to click on specific anchor points of the envelope shape and manipulate them as needed.
Finalize and Refine: Make any additional adjustments to your text or envelope shape as necessary to achieve the desired curvature and positioning.
Expand (Optional): If you want to finalize the curved text and no longer need to edit it as an envelope, you can go to Object >Envelope Distort>Expand to convert it into editable shapes.
How to Warp Text in Illustrator
Now that you can curve text here is how to warp text in illustrator. The Object>Warp option seems like the easiest way to do it.
However, the best way to do it is to use the Envelope distort option. I will show you both how to warp text with the Warp option and How to do it with Top Object.
Method 1: Using the Warp option
Using the warp option is the quickest way to do it. There are over 10 options to choose from under text warp options.
Type different texts in different lines to apply different effects. You can type one and duplicate the text by clicking and dragging when holding down the Alt key.
With the first line of text selected, Go to Object > Envelope Distort > Make with Warp. The text will curve slightly as the default set up.
Here are some of the alternatives you can choose. To adjust the bend and orientation, just move the sliders.
Method 1: Using a custom shape
If you want to warp using a custom shape, you can do it using this process.
Type the text and shape you want to Warp.
Select the shape and bring it to the front. Object>Arrange>Bring to front.
Select both the text and shape.Go to Object > Envelope Distort > Make with Top Object
Popular Designs Using Curved or Warp Text
Curved or Warped text style can be used to create different professional materials. For example you can use it to create Vintage logos text or Flier headlines. The Jameson Logo design is a good real world example where this style is used.
If you just want the ready SVG and PNG no background Jameson Logo, just Click here to download.

Step 1: Type Your Main Text. Select the Type Tool (T) and type your word, for example JAMESON. Choose a bold serif font similar to the Jameson style. Close examples include Caslon, Cinzel, Baskerville, Garamond Bold and more.
Step 2: Create the Curved Text Effect. Select your text, then go to Effect → Warp → Arc. Adjust the Bend between 15–30%, keep it on Horizontal warp, and turn Preview ON to create the curved top effect.
Step 3: Expand the Appearance. Select the warped text and go to Object → Expand Appearance. This converts the effect into editable vector shapes for full customization.
Step 4: Refine the Letter Shapes. Use the Direct Selection Tool (A) to slightly adjust individual letters for smoother curves and a more professional logo appearance. Designers often refine spacing, tilt, height, and curvature manually.
Step 5: Create the Bottom Curved Text. Use the Ellipse Tool (L) to draw a circle, then select the Type on a Path Tool and click the circle path. Type text such as IRISH WHISKEY, flip it to the bottom alignment, and adjust the spacing for balance.
Step 6: Add the Center Badge or Seal. Draw two circles and apply stroke colors to create the badge shape. Use Type on a Path around the circle edge and place initials, an icon, or a logo mark inside the center.
Step 7: Apply Final Styling. Use premium styling elements such as dark green or gold colors, thick serif fonts, tight kerning, and symmetrical spacing to achieve the classic luxury whiskey logo look.
Related Post:
Conclusion
In conclusion, learning how to curve and warp text in Illustrator can help you create more creative and professional designs for logos, t-shirts, posters, social media graphics, and more.
Whether you use the Warp effect for quick adjustments, Type on a Path for precise curved text, or Envelope Distort for custom shapes, each method gives you different creative possibilities. Experiment with the different tools and settings to find the style that works best for your project.
Frequently Asked Questions
How do I curve text in Illustrator?
You can curve text in Illustrator by using the Warp effect, Type on a Path tool, or Envelope Distort feature. The easiest method is to select your text and go to Effect > Warp to apply curved styles like Arc or Flag.
What is the easiest way to warp text?
The quickest way to warp text in Illustrator is by using the Warp options. Select your text, then go to Object > Envelope Distort > Make with Warp or Effect > Warp and choose a style from the list.
Can I edit warped text later?
Yes. Warped text remains editable as long as you do not expand it. You can change the text, font, size, or warp settings at any time. If you use Object > Expand, the text becomes shapes and is no longer editable as regular text.